Friday, May 17, 2019

Ben's DIY Corner: Ball Joint Replacement, Or, My Week In Hell

A few weeks ago, I started noticing a slight creaking sound coming from under my car (2010 Subaru Impreza) whenever I would start from a stop or come to a stop, or sometimes when turning or even going straight at very low speed. It gradually became more pronounced, became kind of a grinding, then popping at times. Researching symptoms, I finally got under the car and examined all the various rubber parts looking for a broken cv joint boot or loose bushing or something. As it turns out, the front passenger side lower ball joint boot had broken, letting grease out, and gradually allowing the metal ball and socket to start grinding together.

I ordered a pair of Moog-branded ball joints from RockAuto.com, figuring I'd do the driver's side too if the passenger side wasn't too bad.

Sweet, fresh, plump, juicy ball joint ready for installation:

I consulted the factory service manual and every youtube video I could get my hands on, and felt pretty confident that even though there were a few painful areas to watch out for, all in all it should be pretty straightforward. A lot of videos I watched emphasized that for drivers in the rust / salt belt, the bolts securing the ball joint would be almost impossible to remove without breaking off. Fortunately, although my car obviously saw some winter action in the two years of its life before I bought it, all the nuts and bolts were easy to remove with a little PB Blaster and some elbow grease. I was also really glad I watched a video specifically on working on a 2010 Impreza, because the service manual I have is for a 2009, and there were some extra stabilizer link bracket bolts I had to remove that I wouldn't have been expecting if I hadn't had the benefit of other users' experience.

After getting everything else ready, I was ready to extract the ball joint istelf from the steering knuckle / wheel hub holder. The service manual instructions for this step are, "Extract the ball joint from housing." Fortunately, plenty of blogs and forum posts and videos seemed to agree that the easiest way to get it out was to prop a length of wood against the lower control arm and whack the shit out of it with a hammer. After a couple of hours, the first bitter tears of the project, and several shattered lengths of pine, I had made pretty much no progress getting the thing out.

To be fair, I was just using a standard household general-purpose claw hammer, so I opted for a slightly more nuclear option and bought a 3-pound hammer and a 3-foot length of 3/4-inch black iron pipe and an end cap from Lowe's. I padded the iron pipe cap and the control arm with several layers of duct tape to mitigate the damage of such direct force.

Three or four whacks and it was out.

Elation. Piece of cake. I always try to keep Hofstadter's Law in mind when working on a car project: "It always takes longer than you expect, even when you take into account Hofstadter's Law." Sure enough, it continues to hold true every time in my experience. At any rate, all I had to do now was to pop the new ball joint into the ball joint holder and reconnect the lower control arm. Got the ball joint in place and secured with a new bolt:

Weird, though, I can't get the wheel hub to move back inward toward the center of the car so I can fit the ball joint back into the lower control arm. Right around this time, Molly tells me dinner's about ready, so I figure, OK, the hard part's done, I'll just grab a quick dinner and then finish everytjing up. Maybe even take it out for a spin later and see how everything feels.

Quick aside / flashback: one video I watched recommended jacking the brake disc up slightly so that the force of hammering down on the lower control arm would be completely transferred directly into the control arm rather than also pulling the whole hub assembly down. I took that advice, and it worked like a charm, but one side-effect I couldn't have predicted was that, as soon as the ball joint was out of the steering knuckle, something about the geometry of the whole situation meant that the force of the jack upward on the hub also meant force pulling the entire axle outward away from the differential.

So, then, the reason that the wheel hub wouldn't move back toward the lower control arm was that I had inadvertently dislocated the inner cv joint. Fuck. Now it's Sunday evening. I text my boss to let him know I'd be stranded Monday and working from home.

Come Monday morning, I called my trusted auto shop to see whether they had any advice about getting the thing towed. Their basic response was that the car was untowable with the suspension in such a disconnected state, but that if I could extract the entire front right-hand axle I could bring it in and they could reassemble it for me. Fuck. OK. So I know that is beyond my ability and toolset. I look up a few mobile mechanics, call them, submit online request forms, and hear nothing. Meanwhile, I'm going back to the car and trying to cram the cv joint back together with all my might and making no progress whatsoever. I finally call a towing company and tell them the situation. They say, "Yeah, we can do that." I call the auto shop to coordinate a drop-off, and they say first-thing Wednesday morning. OK. It sucks that a DIY project finally got away from me, but at least this is a solution.

...

Wednesday morning, 8:45, towing guy takes one look at the car and says, "I'm not going to be able to move that". FUCK. God damn it. I'm really starting to feel like I'm in a nightmare. How can it be this easy to accidentally strand my car in my own garage in America in 2019? At this point, I come to accept that I am truly on my own. My options as I see them are to either to fix the entire thing myself, or at least to get the cv joint out of the axle so I can put the suspension back together enough to have it towed. Molly comes home and swings me by Home Depot so I can grab a socket big enough for the axle nut. Then we go home and she stomps on the brakes to keep them from spinning while I jump up and down on a breaker bar until the nut breaks loose. Thanks, Molly!

From there, it actually is a pretty straightforward matter to detach the hub housing from the strut, and bang the axle back out of the hub.

I then loosen the inner cv boot's larger (inner) boot band and pull the outer part of the axle (everything on the outboard side of the inner cv joint) out. As it turns out, one of the three spinny wheel things in the inner joint had come completely off its axis and was floating around inside the boot. That joint was never going back together without being disassembled first.

I had to hammer the spinny wheel back into place, no big deal. Then I had to extract the inner part of the cv axle from the front differential. Once again, the service manual is extremely helpful on this point: "Using a bar, remove the front drive shaft from transmission." Thanks. All the videos I watched showed this to be a very simple and easy process, but I think all these guys had their car on big lifts. With just jack stands and a 3-foot breaker bar, I had a hell of a time getting purchase on the side of the transmission case to wedge the thing loose. After a long time, and on the verge of despair, I popped the thing out and whanged the shit out of my knuckles on the underside of the car. Once the entire axle was out, it was simple but kind of scary to hammer the two halves together until all three of the rollers slid past the retainers into the joint. That jack must have been applying a huge amount of force in order to pull those rollers out of the joint.

A boring and frustrating 24 hours later, I finally had the axle fully reassembled and the inner boot secured with fresh bands. Now it was time to reinsert the axle back into the front differential. The sticking point, it turns out, was the lock ring that keeps the entire axle from sliding in and out as the suspension moves up and down while driving (and forces those rollers inside the inner cv joint to do the sliding in and out instead). After a couple of hours of trying to force it in by hand, and taking the advice of an obviously equally-frustrated youtuber, I asked molly to lightly tap the far end of the axle with my new, trusty 3-pound hammer while I forced the axle inward against the differential. She was...unenthusiastic about the prospect, but it turns out that two fairly light taps were all it took to push it back into place. Fuck yes. After that, it was truly rudimentary to fit the outer end of the axle back into the wheel hub and reattach the strut.

I then slid the lower end of the ball joint into the lower control arm, and only then realized that in all the commotion I'd managed to tear the boot of the new ball joint. By this point, I was so numb to the whole thing that I just grabbed the second ball joint I'd bought, popped the broken one out, and replaced it in what felt like about five minutes.

Took it for a spin, no weird sounds or vibrations, all good. Got home, and something smelled distinctly of burning plastic. I popped the hood and saw a fair bit of grease and/or oil smoking on the exhaust manifold. I grabbed the fire extinguisher, but after a minute the smoke stopped. I wiped everything down very thoroughy and will have to remember to keep an eye on things for the next couple of outings.

Monday, April 29, 2019

Side by Side: One Year Later

This Thursday it'll be one year since we closed on The Cantaloupe House. We're essentially done now. We just live in a regular house. It's a good thing, too, because we're never moving again.

We replaced all the flooring in the house, painted the exterior and every room (including most of the ceilings), replaced all the light fixtures, replaced all the electrical sockets, light switches, and covers, replaced all the doorknobs and hinges, changed all the locks (we only had a key to a couple of the doors and most of them didn't work anyway), replaced the thermostat. We changed out the electric stovetop for gas, which was much more complicated and drawn-out than one might imagine, and took out a hideously installed gas fireplace to convert it back to wood-burning.

Outside, we got rid of a half-dozen birdhouses on PVC pipes, a huge trellis overgrown with ivy, a length of wooden picket fence in the woods on the side of the house, and a pointless gate in the middle of the back yard, also overgrown with ivy. We've torn out 5 rosebushes (don't worry, still at least 20 in the ground) and a small patch of daffodils (hundreds, maybe thousands, remaining). We also tore out a dying tropical rock garden in the front yard. Every corner of the yard is full of flowers and flowering bushes and trees, and I suspect if they'd waited to sell the house until summer they would have had a lot more interest. Our yard is beautiful, and I don't even care about having a beautiful yard.

So I thought it would be satisfying to line up all the befores-and-afters in one post.


I admit, looking at that yellow and green last night I was surprised all over again at how terrible it was. What was I thinking??


THE KITCHEN.

I really feel strongly that the kitchen is the reason nobody else had the vision to snatch up this house. Besides being ugly, it was also filthy. It was hard to imagine it being a normal place. Even the floor vents were old and corroded; I remember glancing at one of them nervously during the open house. This kitchen, though, is also where I realized I was probably going to try to convince Ben we should buy this house. Some people walked in the back door from the laundry room and I felt my brain go, "Get out of my house!" 


SHIVERS.


MAIN LIVING AREA

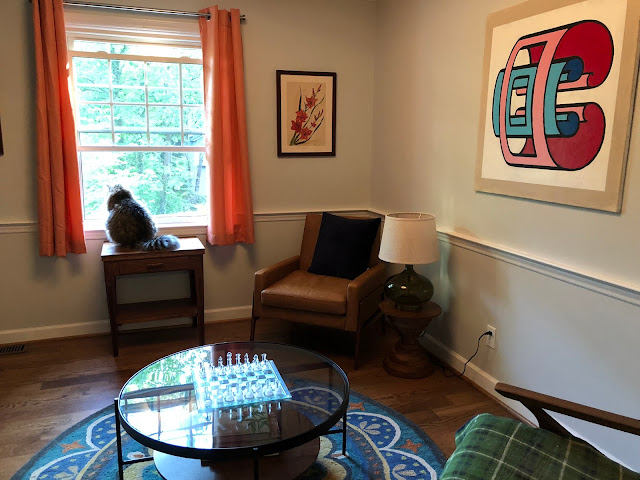
We have two living rooms and a dining room, which we also put chairs in for seating because we don't need a formal dining room. This space was all divided up by hideous railings but we took those out.


I was afraid it would look weird having this open space with stairs in the middle, but it was going to add many thousands to the cost to make steps go across the whole space. I'm sure it's not up to code, but again: never moving, so who cares. We ended up really liking the way they look.


It's amazing how open the house feels without the railings blocking in each section of the main living space. All the various workmen who come to our house comment on it in surprise, how nice and open it is.

FIREPLACE ROOM


I don't have any pure before photos of the fireplace room, because I found it so intolerable we started taping it off to paint on the very first night. (As the weeks went on and we became expert painters, we abandoned taping altogether as a huge waste of time. But we were new at it on Day 1.) Fortunately, there is this one from the listing. It cracks me up so much to think about a realtor taking pictures of this and putting it online as if to try to portray something about it as a selling point.


 LAUNDRY ROOM


The laundry room cabinets were not good. The one on the left had been infested by mice at some point and many rounds of bleach could not get the smell out. When our tile man took all the cabinets out to put in the floor, we told him not to put them back, and I'm glad we did. It's much better for the cat litter.

LIVING ROOM


This big wall in the living room is the only major undecorated spot. Ben's working on some paintings.


DINING ROOM 


THE HALLWAY

The hall was extremely grim. This picture doesn't really do justice to the blinding florescent lights reflecting off the yellow-green walls.


OUR BEDROOM

For most of the rooms, I don't have pictures of the hideous custom drapes, but I took this at the open house.


GUEST BEDROOM

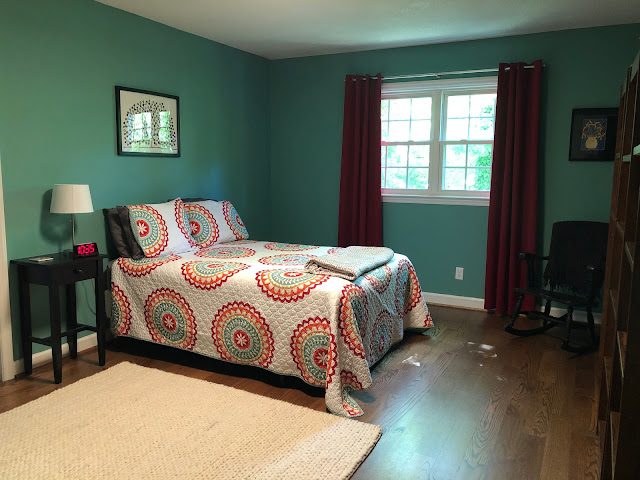
This is a big room that's intended to be the master, but we wanted the window seat so we chose that one for our room. You can see here how the paint under the window was a slightly different shade. There were also dozens and dozens of tiny holes in the walls. We have a pretty hard time imagining how she managed to live in this house without going crazy.


GUEST BATHROOM

This bathroom was the worst part of the entire house. It was painted over wallpaper, and we spent an entire weekend, both working all day long, peeling it off in tiny bits. Also, the floor under the toilet was rotted and had to be completely replaced.


BEN'S ROOM


You know, at least there aren't cartoons scribbled on the walls like in the old house.

HALL BATHROOM


This marble tile is in both bathrooms. We don't love the bathrooms as they are and will probably make some changes in the next few years, but they're fine for now.


SUNROOM

I don't have a good picture of the sun room beforehand, so I snagged this from the listing.  I remember Ben asking me when he first looked at it, "What IS that room?" It was yellow-green, of course, with laminate flooring. 


It's my very favorite room. Perfect for reading and music and yoga. We took off these doors as they serve no purpose.


Mostly what we've done outside is cleaning up a mess and throwing stuff out, but I really wanted at least herbs and tomato plant, so I planted a few in pots. I was going to put them in that bed around the back patio but it turned out to be absolutely packed with daffodils. Then I impulse-bought a couple of blueberry bushes and ripped out all the daffodils on the corner to have a place to put them.

We cut the rose bushes back to almost nothing last fall but they sure did come right back.


This was a lot of work. Looking back, those first six months seem like an exhausting blur. I've been watching the homes for sale in town in the year since we bought it, though, and have only seen a handful - literally, five or less - houses that would have suited us as well. And zero of them had a two-car garage. We got lucky. Thank you, Harriet, for making your house so ugly.

Anyway, The End! Just kidding, it never ends. We're painting the shed on Saturday.